With spring already here, it’s time to spice up your living and outdoor space with floral eco-friendly decorations, and instead of going to Target and buying the decorations, make them yourself and save loads of money! Taken from Tumblr, Pinterest, and Etsy, enjoy these step by step tutorials for a fun activity to do while saving the planet!
- Cute Cut Creation
 Supplies: Empty lotion bottle, permanent marker, scissors / X-ACTO knife, plant, soil.
Step 1: Cut the bottle [according to the image]
Step 2: Draw a design on the bottle with a permanent marker
Step 3: Fill the bottle with soil and a plant of your choice
Step 4: Nail the long sided part of the bottle to a fence (or cut out a circle on the long side to fit on a doorknob)
- Flower Power
 Step 1: Hot glue gun rolls together into a huge flower masterpiece
Step 2: Spray paint the decoration
Step 3: Tie a string around one of the top rolls and hang from ceiling, roof, or other stable construction. (Alternate idea: Put nails on the wall and set the middle of the flower on the nails just like how a picture frame would stay up)
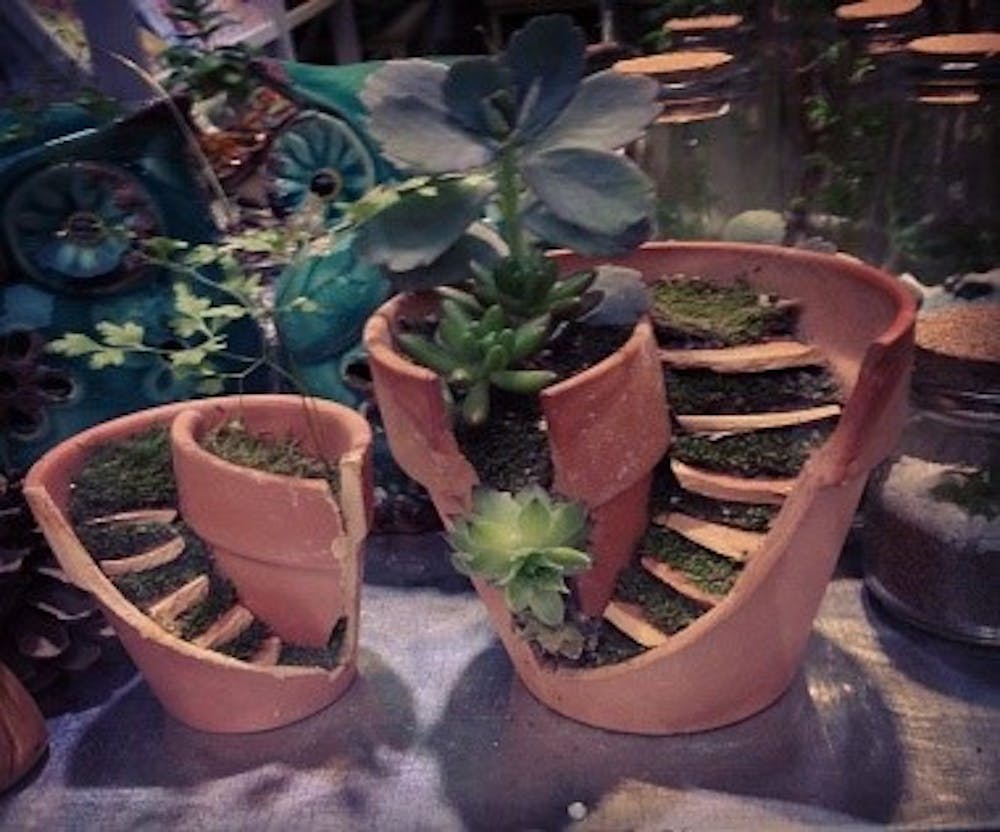
3.Broken Potted Fairy Garden
Supplies: Broken pot, old miniature doll toys and furniture, plants, soil, and rocks.
 Step 1: Take the broken pieces out of the pot and set them aside.
Step 2: fill the pot with as much soil as you can without spilling over.
Step 3: Take the tallest broken piece of the pot and scoop op the soil
 to make room for the “stairs”.
Step 4: Break up the rest of the broken pieces of the pot and place them on the soil for stairs.
Step 5: Plant with greenery and miniature flowers.
Step 6: Add doll decorations for a cute and stylish fairy garden!
- Reusable Basket
 Step 1: Cut the top of the jug off, (about ¼ of the water jug)
Step 2: On the edges you just cut, place tape on the outer edge for a clean look and to prevent any cuts from excess plastic.
Step 3: Use the knife to punch 4 holes on the top of the jug
Step 4: Take the rope and pull through the holes, make sure both ends are on the same side.
Step 5: Do the same on the opposite side.
Step 6: Tie a knot at the end of each rope to ensure the rope won’t slip out.
Step 7: Put anything you want in your newly created basket!
- Dorm Terrarium
 Step 1: Fill the bottom of the vessel with a 1 ½ inch layer of small rocks (to collect water drainage)
Step 2: Add a layer of cactus potting soil, about 2 ½ inches deep.
Step 3: Remove your tallest and biggest plant from its container and take extra soil off the roots.
Step 4: Use a stick to make a hole in the soil big enough for the plant and its roots
Stap 5: Pat down the soil so the plant is secure
Step 6: Repeat steps 3-5’s planting process for the rest of your plants.
Step 7: Add about a ¼ inch layer of white sand around the plants
Step 8: Place a few rocks and pebbles around the plants for a completely refreshing look
Step 9: Sprinkle the terrarium’s soil with water about every two weeks or once the soil dries out.
Sources:
- https://www.pinterest.com/sreeram700/bottle-diy/
- http://rebeccakelsey.com/2013/08/diy-paper-towel-home-decor/
- http://www.boredpanda.com/broken-pot-fairy-garden/
- http://www.realsimple.com/home-organizing/gardening/indoor/how-make-terrarium